
Since its inception in 2004, Facebook has become one of the most-noted social media websites having the highest number of members. A site that was started to connect with friends and family soon evolved into an eCommerce platform. Therefore, when Meta (its rebranded name) rolled out its proprietary payment system Facebook Pay (Meta Pay), it was no surprise that it became a raging hit! Are you looking to figure out how to set up Facebook Pay? Your search ends here!
This content will provide you with details of the same and show you how it works, specifying its safety features and availability. On a parting note, it will also give you an outline of how it specifically works, and it’s set of pros and cons. Let’s get straight to the point –
Table of Contents
How to set up Facebook Pay for transactions?
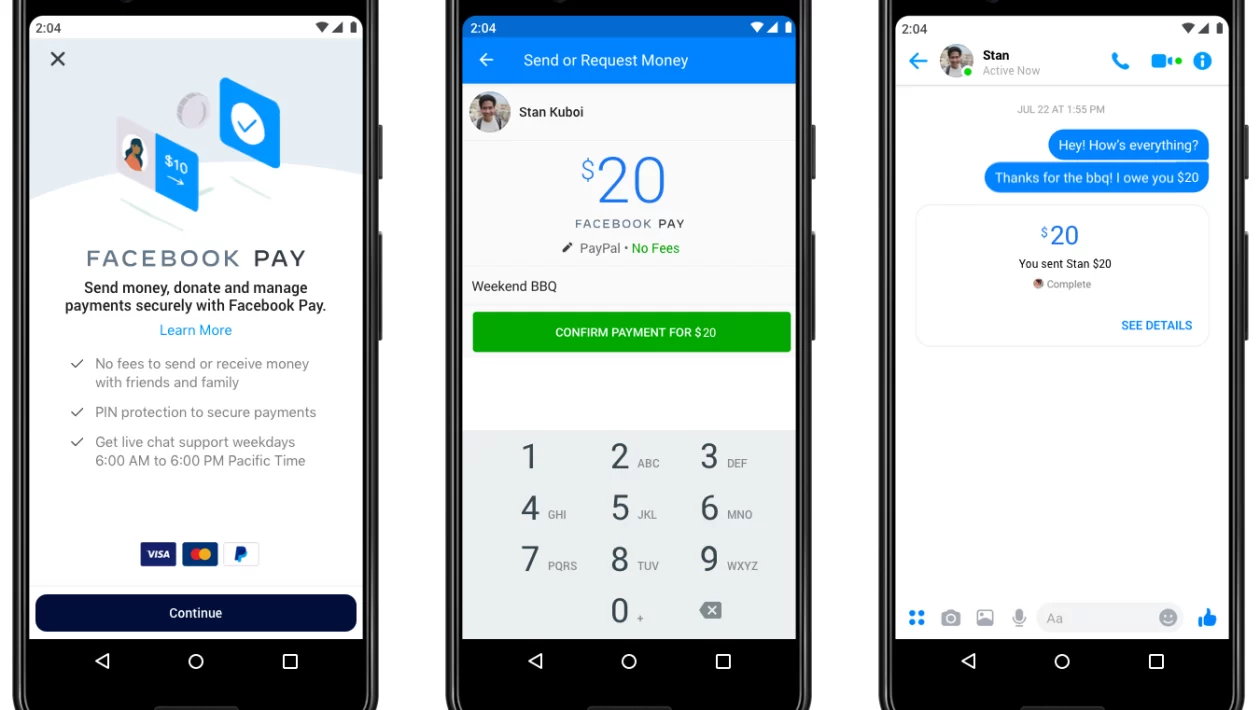
Though you already are aware of Facebook Pay, on a repetitive note – it is a secure virtual mode of payment (a digital cashing service provided by Facebook). Quite similar to PayPal, you can make payments via your Android or your computer.
Also, unlike other online payment apps, Facebook Pay exists within Facebook, Instagram, WhatsApp, and Messenger. Therefore, you just need to have your accounts on these apps to use this Pay service technically.
Getting started –
1. If you are a customer
Assuming you are looking up how to set up Facebook Pay on a desktop from a customer’s point of view –
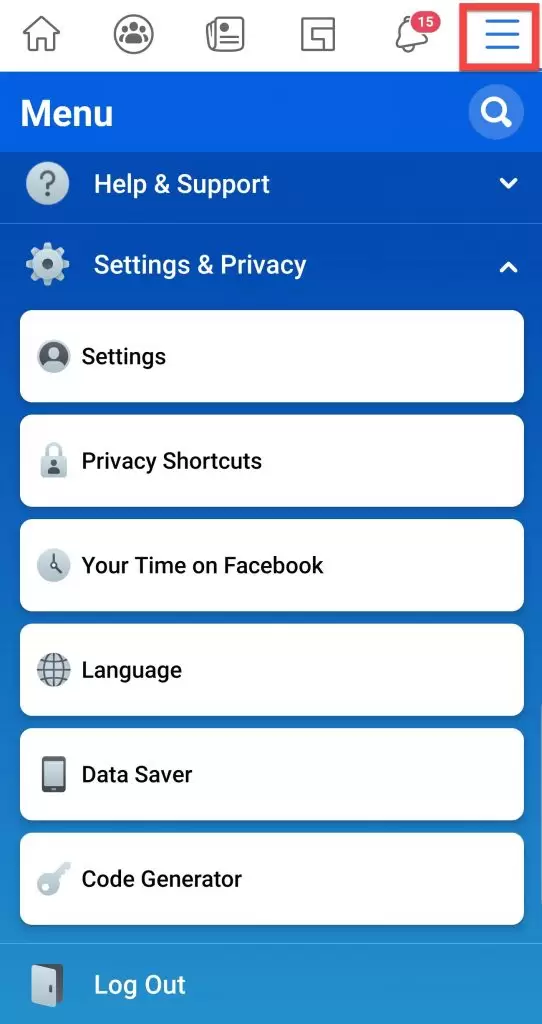
- Sign in to your Facebook account and navigate to your Settings and Privacy section (use the downward-looking arrow on the top right of your desktop screen).
- Click on the Settings icon, and from the given range of options under Account Settings – check out Facebook Pay.
- On clicking on Facebook Pay, you will automatically be directed to a link stating Add Payment Method.
- To get that, you will have to add either your PayPal account or your debit/credit card. Though last checked, no other account was allowed – but if you do get any (as per the latest updates) and have access to the same, you may add that account as well.
- Either connect your PayPal account or put in your credit or debit card details (please be careful while putting in these details since they could be exposed in case of any fraudulent activity). You must not be on a call or distracted in any manner while putting in the details. Double-check the details and your phone’s security layers before confirming the same.
- Once you are done – click on Save, and assuredly your payment details will be saved, and you can carry on the payments thereon.
Are you with us till now? Have you followed the procedure and have been able to set up your Facebook Pay? If yes, then there’s a last check that you will have to make –
When you make purchases through Facebook, Messenger, Instagram, or WhatsApp, you will see this pay (currently Meta Pay) as an option. However, the seller needs to accept this payment option, and your country and region must accept the same as well. For the unversed, it is available in – Asia Pacific, Africa, Latin America, North America, Europe, Caribbean and the Middle East.
That’s how to set up Facebook Pay on a desktop. In case you have a mobile, the process you have to follow is quite similar. Herein –
- You will have to launch the Facebook Pay app.
- From there, you will have to go to the Settings and Privacy option (you must have seen the three horizontal dots on the lower right-hand side).
- Hereon, you follow the normal process of clicking on the Settings icon, and going to Account Settings and then going on to the Facebook Pay option.
- Add the credit/debit card details or your PayPal details. Save the info and start using it under the Payment Methods.
2. If you are a business owner
In case you are a business owner, the steps to set up your Facebook Pay account will be slightly different. Though apparently, the set-up process is on similar lines, but, inherently you will have to make a couple of changes and accept Facebook Pay as your mode of transaction on your business page (i.e., Instagram and Facebook shops).
So – quickly glancing through the process – go to your Facebook account and from there to the Settings and Privacy section. Under the header of Account Settings, you will get Facebook Pay, and to that, you have to add the required debit/credit/PayPal details. Save it, and you are ready to use it for accepting payments. As mentioned above – accept Facebook Pay as your mode of accepting payments on your official business page.
If you have been with us till here and now and would like to know some other facets of using Facebook Pay, let’s just give you one small piece of info –
If you are using your US Shopify store, you can use Facebook Pay without even having an account (otherwise, having an account in Facebook and its related apps is essential).
Steps to follow –
- Enable your Shopify Payments and go to the admin domain.
- From there, go to the Settings area, and go to the Payments section.
- Under this Payments section, you will automatically get Shopify Payments. As you scroll down – you will navigate to the Manage icon.
- Within this – go to the Wallets section and opt for Meta Pay. Once done with that, you can Save the details.
If you have filled up the required details and matched up to the policies of Meta, assuredly, your business page will be ready in the next 2 days.
What are its safety features?
With this transaction app, you need not fear for the safety of your money.
- Facebook Pay does not reveal your information to your contacts. Also, the payments are not visible on your feed.
- Meta is quite particular about using a set of reliable processors for their transaction procedures. Hence, be assured of the safety concerns since Facebook encrypts your connections and the confidential data that you have stored.
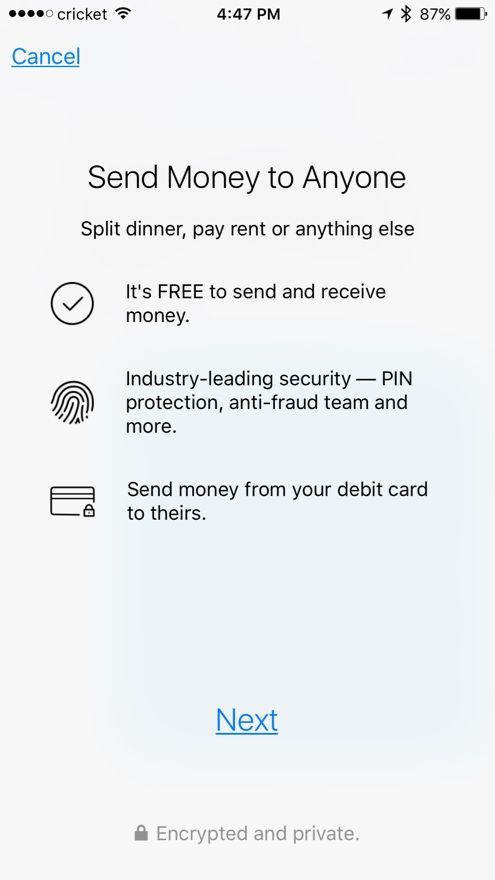
- Lastly, Facebook has a strict data-sharing policy, and that’s how it manages its privacy levels. With its anti-fraud monitoring process, it notes unauthorized transactions and hence protects you from hackers.
Thus, rest assured your knowledge of how to set up Facebook Pay can be actualized without any privacy concerns, especially in such dicey situations.
How is Facebook Pay beneficial?
Though you are still scrolling down this article and supposedly have understood how to set up Facebook Pay, it is, therefore, time to give you an insight into its range of benefits. So, why do more and more people wish to use this?
- Every time you have to make a payment, you will not need to enter the complete details. In fact, you can use Facebook Pay directly by connecting it with multiple apps.
- Details about payment, transaction history, and settings are available in a single place – streamlined.
- In case of any discrepancy, live chat is available – both within and outside the US domain.
- This is a consent-granted app. Despite you using Facebook, it will automatically not set up the payment options for you. Rather, you will have to choose it and set it up across multiple compatible apps.
Thus, compared to the other payment apps available in the market, Facebook Pay (Meta Pay) becomes an immediate choice, all thanks to its ease of usage.
How is Facebook Pay different from others?
It is the series of benefits that Facebook Pay provides that make this payment app better than its counterparts.
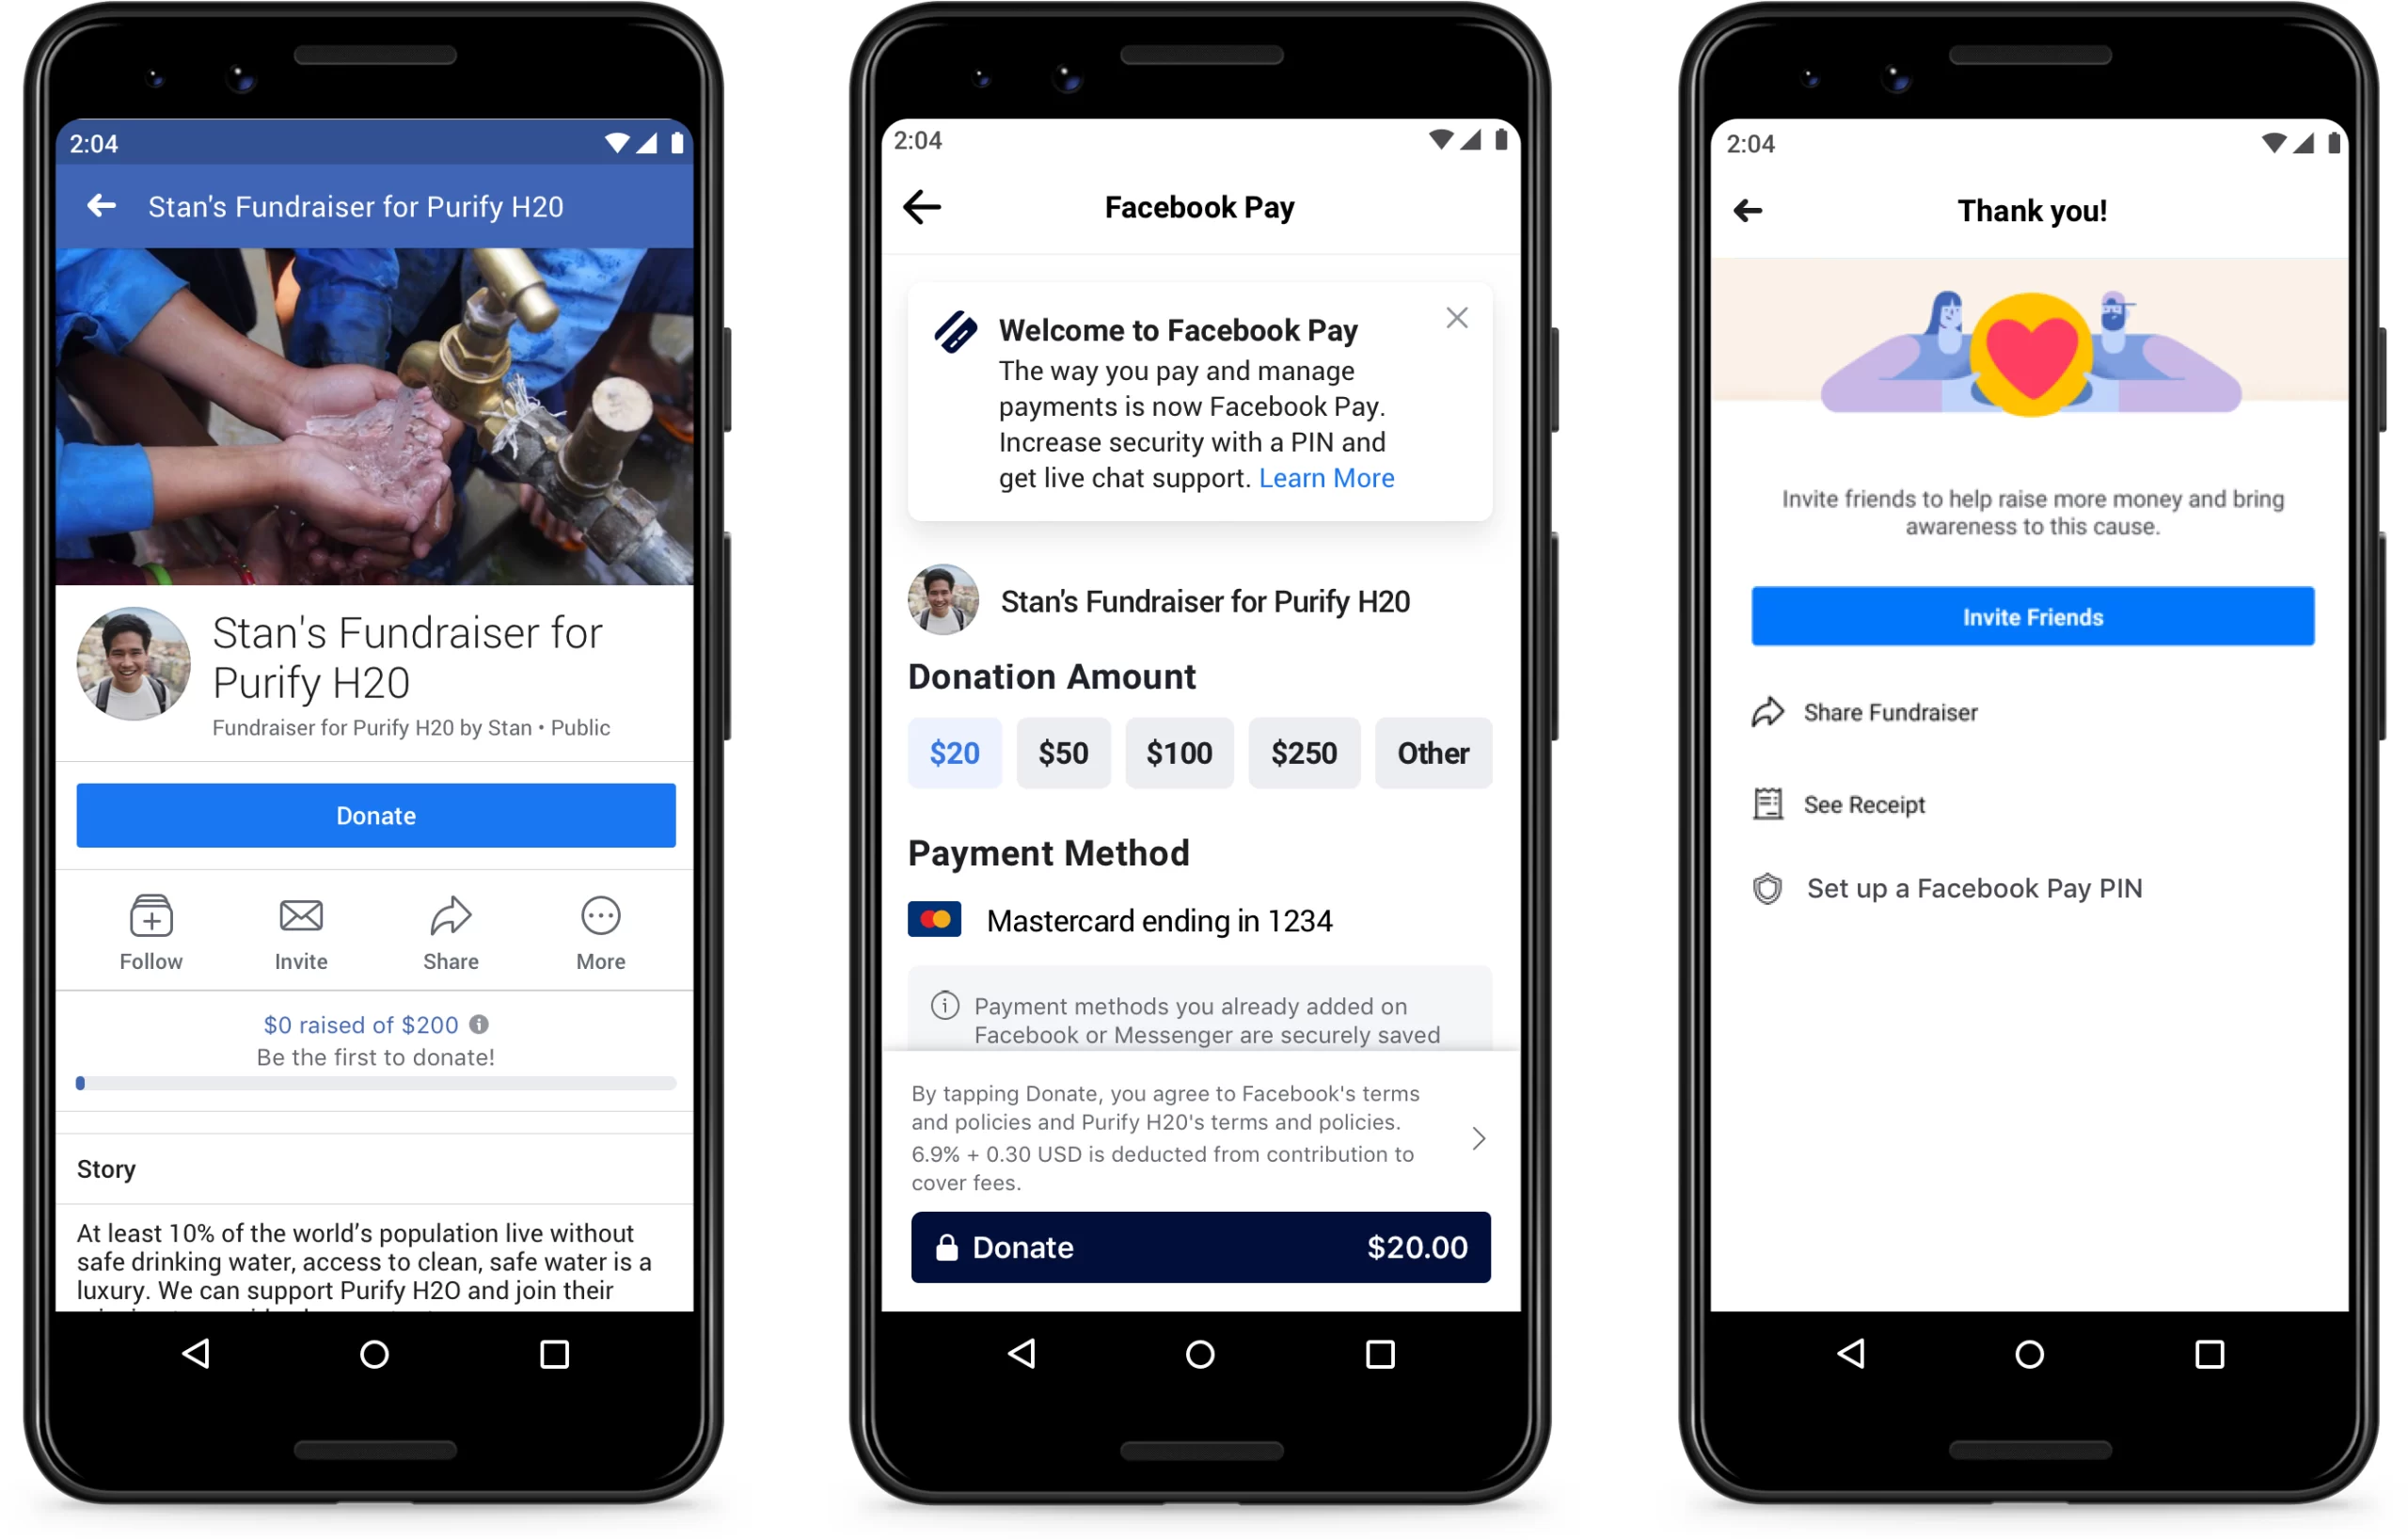
- You can safely send money over Facebook Messenger. Apart from the usual shopping, you can also donate to charities and other events that pop up on your feed.
- In case you wish to use the app on a specific device – say on Facebook only and not on Instagram or any other associated app – there’s a chance for that as well.
Does Facebook Pay come at a price?
For the ones who’ve come in late – Facebook Pay is free of cost. Whether you are a customer or a business operator using this app, it comes without paying a dime.
Wrapping up
In recent times with the competitive base increasing, more and more business owners have been looking for alternatives. Keeping into account the demands of the public, Facebook Pay is a great alternative to PayPal or even Whatsapp Pay. Given that you have clarity about how to set up Facebook Pay, you can always use this to set up a close-knit relationship with your tech-savvy base of customers. If you found this article helpful, do forward it to your friends and family and keep checking this website for more!