
If you just got yourself a new iPhone and wish to transfer data from your Android to the same, the process can be a little tricky. After all, the ecosystems differ and transferring details from one to another will take some time, nonetheless. If you are looking to know how to transfer music from Android to iPhone, then your search ends here!
Let’s get started –
Table of Contents
How to transfer music from Android to iPhone?
Note – Before you get to the steps of transferring the music from one set-up to another, you must know that – if you are using any music app on your Android, such as Apple Music, Spotify or even Google Play Music – you will not need to transfer the music to your iPhone. Once you download the same app on your iPhone and log in with identical credentials, the playlist and the associated data will automatically be carried over.
But, if you have the songs in the SD card or the local memory of your Android phone – in that case you will require to do the needful.
1. Transferring music without computer
Here are a couple of ways to do the same –
Process 1

Want to learn how to transfer music from Android to iPhone directly? You can use the cross-platform app – SHAREit
Step 1 – You will have to download and install the SHAREit app on both your Android and iPhone. Set up the app and enter your credentials. Once it is done – ensure that both your phones are connected to the same WiFi network.
Step 2 – Once you open your SHAREit app, you will have to click on the Music tab and list out the songs that you want to send.
Step 3 – Now click on the send button, and automatically, your Android’s SHAREit option will look for WiFi to connect.
Step 4 – Now go to your iPhone and click on the Receive option. After the scanning, you will see your iPhone’s name. As soon as you tap on it, the music transfer will begin.
Note: In case you do not have a WiFi connection, you can try the option of Connect to iOS/WP and then Continue. On your iPhone now, launch the Settings app and connect with either the Android share or the available hotspot. The rest of the process will be similar to the ones mentioned above.
Another point to note is – in case you use any tool such as AirDroid or Xender, you will be able to transfer the music, but since these are third-party apps, therefore the songs will remain inside the app and will not be transferred to the default music app on the concerned iPhone.
Process 2

If you wish to understand how to transfer music from Android to iPhone – you can use Google Play Music.
Step 1 – Assuming you already have Google Play Music on your Android, this music transfer is a breeze! You will have to download this app on your iPhone as well.
Step 2 – Once you log into Google Play Music on your iPhone, automatically, the playlist will get updated, and you will be able to listen to your songs.
Process 3

You may use Amazon Music to transfer your playlist from one phone’s ecosystem to another.
Step 1 – Herein, initially, your Android must have the Amazon music app. In that case – you will have to download the same app on your iPhone.
Step 2 – When you will log into the Amazon app with your credentials, automatically, the playlist will be updated – ensuring that all your songs from the Android are listed on the iPhone.
2. Transferring music via the computer
In the previous section, you have categorically seen how to transfer music from Android to iPhone without using a computer. But you might not be so lucky always and may need the support of your PC or MacBook in transferring the same. Here are some ways to do the same –
Process 1
You must have heard of iTunes. You can use this to transfer music –
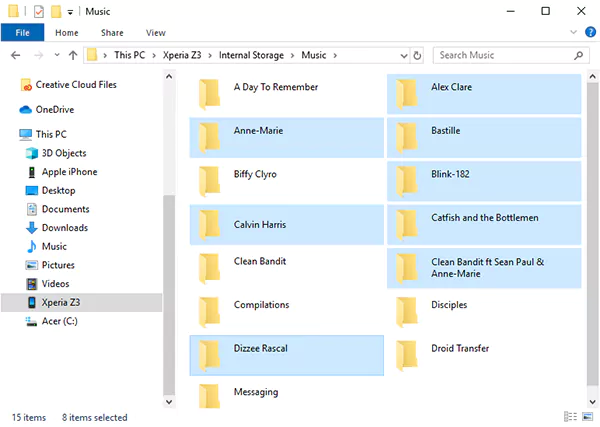
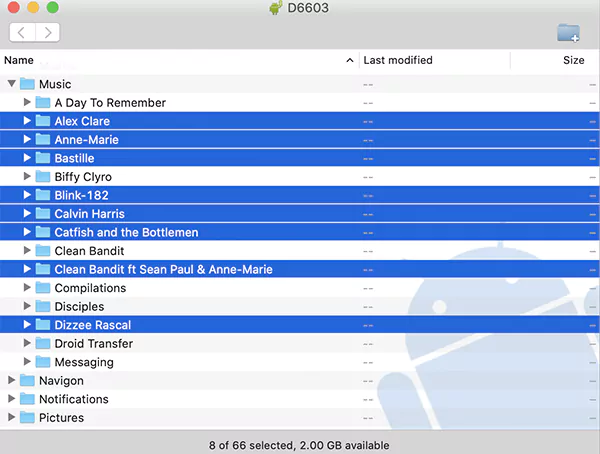
Step 1 – You will have to begin by connecting your Android to your MacBook or computer and go to the songs folder.
For the record – you must use the Android File Transfer option when using your MacBook. Install it and run the app and then go to the music folder.
Step 2 – Create a new folder on the desktop and name it accordingly, say – ‘Music Folder Android.’ Then go to your Android folder and copy the songs from there and paste it into the new folder.
Step 3 – Open the iTunes app and click on File. From there, you will have to go to Add to the Library section and select the songs. If this is not feasible, you can always open the folder and select all the songs and then continue to open the same in the iTunes app. Technically, your Android music library is now in your iTunes library.
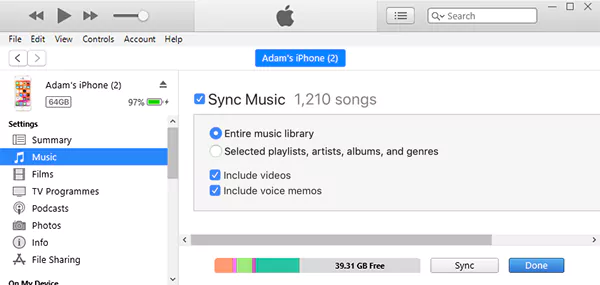
Step 4 – Take your iPhone and connect it to your computer. You will see a trust pop-up, click that and enter your password. Inside your iTunes, you will see the iPhone icon and click on that and from that on the Music tab.
Step 5 – Finally, you will see a Sync Music tab. Select the playlist and click on that. Proceed as per the instructions.
Process 2
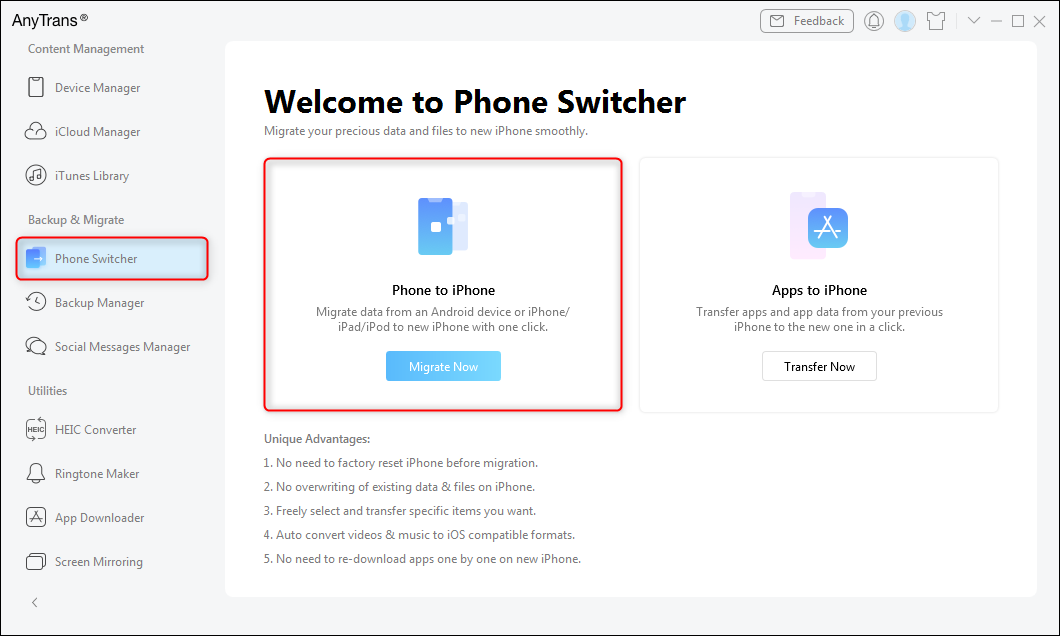
You can also transfer your chosen songs from your Android to your iPhone using AnyTrans on your computer.
For the unversed – AnyTrans is a phone-to-phone directly connected tool used to transfer data. This is also used as a phone data assistant for your iPhone.
Step 1 – You will have to download and install AnyTrans on either your computer or MacBook.
Step 2 – Now, connect your iPhone and Android to your computer. From thereon – select the Phone Switcher option. Finally, opt for the Phone(Android) to iPhone tab.
Step 3 – In order to select the source device and the target device – you will have to click on the ones from where you wish to make the transfer to the one you are transferring. To continue with the process, click on the Next option.
Step 4 – With us till here? From hereon, details can get a little complex. You will see a section called Categories – from wherein you must select the songs (in this case – but also you may select movies or any other data you wish to transfer) and then continue by clicking on the Next button.
Step 5 – Assuming you have understood how to transfer music from Android to iPhone at a stretch, what if you wish to selectively transfer certain songs? For that – you will have to go to the Device Manager section and from there, go to Category Management. You will see the option of Click Music there itself.
Step 6 – Pick out the tracks that you want to transfer, and to begin with the process – click on Send to Device option. Your music transfer is done!
Process 3
Now that you are almost at the last quarter – is there any other way to know how to transfer music from Android to iPhone? There is – transferring via Phone Transfer.
Phone Transfer is a paid transfer tool that helps to shift files from Android to iPhone.
Step 1 – If your Mac or computer already does not have Phone Transfer, you must install it. Click on it to open the app.
Step 2 – Connect both iPhone and Android to the computer and wait for the computer to recognize the devices.
Step 3 – You will see a couple of pop-ups – and on your iPhone, you will have to click on the Trust button, and then on your Android – you have to click on the USB debug mode.
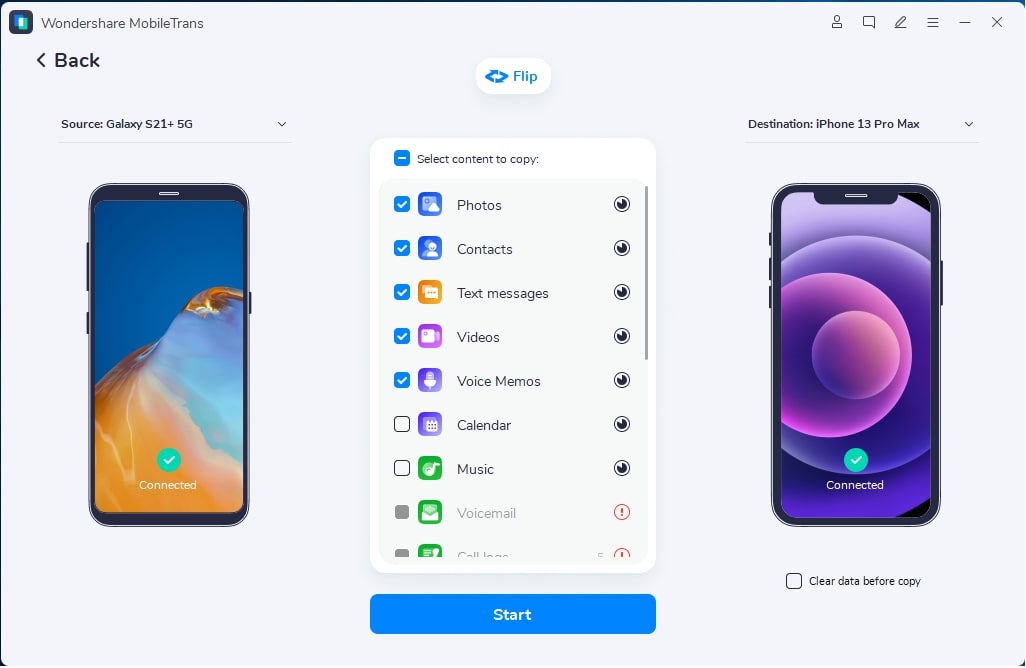
Step 4 – Lastly, within this Phone Transfer app, you will have to fix the Source and Destination marks. From select content to copy – check the Music copy and click on the Start Copy icon.
That’s how you transfer your favourite music from Android to iPhone.
Final Thoughts
Assuming you have read this article well, you have complete clarity about how to transfer music from Android to iPhone without investing a penny. Follow the procedures well, and assuredly you will get the best results. For more details – keep checking this space for more!